FibaCloud
Skip to content
Ask a question

Press ESC to close

Install InfluxDB 2.x on Ubuntu 24.04

This guide installs a new InfluxDB OSS 2.x server on Ubuntu 24.04 LTS and writes/queries a time-series measurement. InfluxDB 1.x, 2.x and 3 do not share one package, API or query model. Do not apply these steps over an existing 1.x/3 installation or data directory. For InfluxDB 3, evaluate its separate official installation procedure.
The journey of time-series data
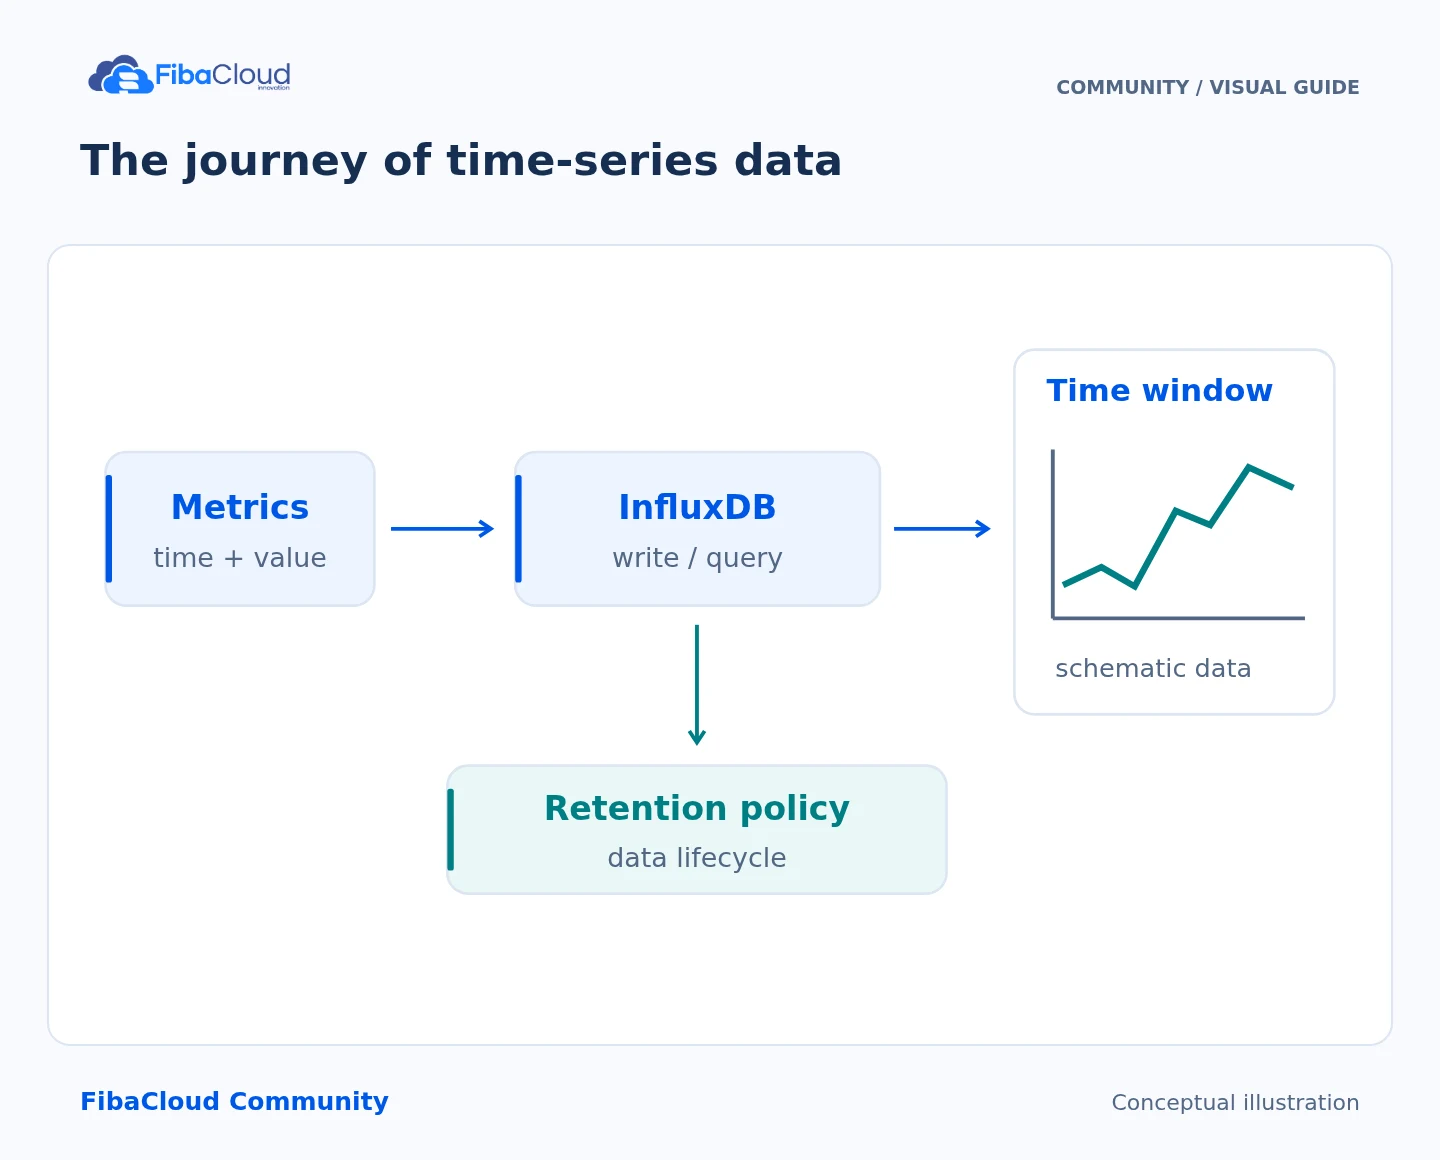
The journey of time-series data Timestamped measurements are collected, written to the database and queried over time windows. Retention defines their lifecycle.
Step-by-step explanation
  1. Measure: Timestamp every sample.
  2. Write: Use the API for your chosen version.
  3. Query: Compare measurements over a time window.
  4. Retain: Set a retention policy for your needs.

Prerequisites and access model

You need a sudo user, server-console access and an SSH client. Initial setup will listen only on loopback; do not expose port 8086 publicly. If InfluxDB or its data already exists, identify its version and backup/migration plan first.
cat /etc/os-release
dpkg-query -W 'influx*' 2>/dev/null
ss -lnt | awk '$4 ~ /:8086$/ {print}'
sudo apt-get update
sudo apt-get install ca-certificates curl gnupg

Add the signed APT repository

The official 2.x installation guide documents the archive key and a signed-by repository for Ubuntu 24.04. Compare the fingerprint below with that document. If the vendor rotates its key, review the new official fingerprint instead of bypassing verification.

key_dir=$(mktemp -d)
curl --fail --show-error --location \
  https://repos.influxdata.com/influxdata-archive.key \
  -o "$key_dir/influxdata-archive.key"
gpg --show-keys --with-colons "$key_dir/influxdata-archive.key"

The first primary-key fpr value must be 24C975CBA61A024EE1B631787C3D57159FC2F927. Stop on a mismatch. After verifying it:

sudo install -d -m 755 /etc/apt/keyrings
gpg --dearmor --output "$key_dir/influxdata-archive.gpg" \
  "$key_dir/influxdata-archive.key"
sudo install -m 644 "$key_dir/influxdata-archive.gpg" \
  /etc/apt/keyrings/influxdata-archive.gpg
printf '%s\n' 'deb [signed-by=/etc/apt/keyrings/influxdata-archive.gpg] https://repos.influxdata.com/debian stable main' \
  | sudo tee /etc/apt/sources.list.d/influxdata.list
sudo apt-get update
apt-cache policy influxdb2 influxdb2-cli

Verify that candidates come from the expected InfluxData source and that the server package belongs to 2.x. Do not use apt-key or APT options that disable signature validation.

Restrict the first startup to loopback

The mask below prevents package installation from starting an unconfigured service on a new installation. Do not apply it to an existing production service.

sudo systemctl mask influxdb.service
sudo apt-get install influxdb2 influxdb2-cli
sudo install -d -m 755 /etc/systemd/system/influxdb.service.d
printf '%s\n' '[Service]' 'Environment=INFLUXD_HTTP_BIND_ADDRESS=127.0.0.1:8086' \
  | sudo tee /etc/systemd/system/influxdb.service.d/listen-local.conf
sudo systemctl daemon-reload
sudo systemctl unmask influxdb.service
sudo systemctl enable --now influxdb.service
sudo systemctl status influxdb.service --no-pager
influxd version
influx version
ss -lnt | awk '$4 ~ /:8086$/ {print}'
curl --fail --show-error http://127.0.0.1:8086/health

The listener must be 127.0.0.1:8086. If you see 0.0.0.0 or [::], fix the configuration before allowing public access. The server and CLI are versioned separately; their version numbers need not match.

Create the organization, bucket and initial account

On the server, run umask 077, then influx setup. At the interactive prompts, choose a strong administrator password, organization fibacloud-lab, bucket metrics_lab and a retention period such as 168h. That is one week for this lab; determine actual retention from your requirements. Do not repeat setup on an initialized instance.

The CLI’s local configuration may contain a privileged token. Verify that ~/.influxdbv2/configs is readable only by your account. Do not give the administrator/operator token to an application or Grafana.

For the web UI, open a tunnel from your own computer. Replace the example host/user with the verified identity of your server:

ssh -N -L 18086:127.0.0.1:8086 [email protected]

Open http://127.0.0.1:18086 in your browser. This local HTTP endpoint is inside the encrypted SSH tunnel; never send tokens over HTTP directly to the server’s public IP. Shared or permanent access needs HTTPS and restricted networking.

Write and query using a restricted token

In API Tokens, create a custom token with read/write access only to metrics_lab. For separate production writers/readers, split those permissions into different tokens. Read the token interactively instead of adding it to shell history:

read -rsp 'Token: ' INFLUX_TOKEN
printf '\n'
export INFLUX_TOKEN
export INFLUX_HOST=http://127.0.0.1:8086
influx write --org fibacloud-lab --bucket metrics_lab \
  'cpu,host=demo usage_user=12.5'
influx query --org fibacloud-lab \
  'from(bucket:"metrics_lab") |> range(start:-15m) |> filter(fn:(r) => r._measurement == "cpu")'
unset INFLUX_TOKEN

The result should include host=demo, usage_user and 12.5. Without an explicit timestamp, the server uses write time; your query range must include it. Verify that the token cannot access other buckets or administrative operations. Distinguish a 401/403 for an invalid token from a wrong bucket name or an empty time range.

Backup, troubleshooting and recovery

Follow the 2.x backup/restore procedure with an appropriately privileged account. Restore into a separate instance and verify measurements and token permissions. Do not treat an ordinary copy of a running data directory as a reliable backup.

For startup problems, inspect sudo journalctl -u influxdb -n 80 --no-pager, the version and the drop-in. Correct the port/service setting instead of removing the local-access boundary. Stop a failed new installation and retain its data/logs; do not delete an existing data directory. A 2.x-to-3 migration or downgrade is a separate data-migration project.

Sources

Technical content and sources reviewed on October 4, 2026. Recheck the relevant official documentation when a version or provider changes.