
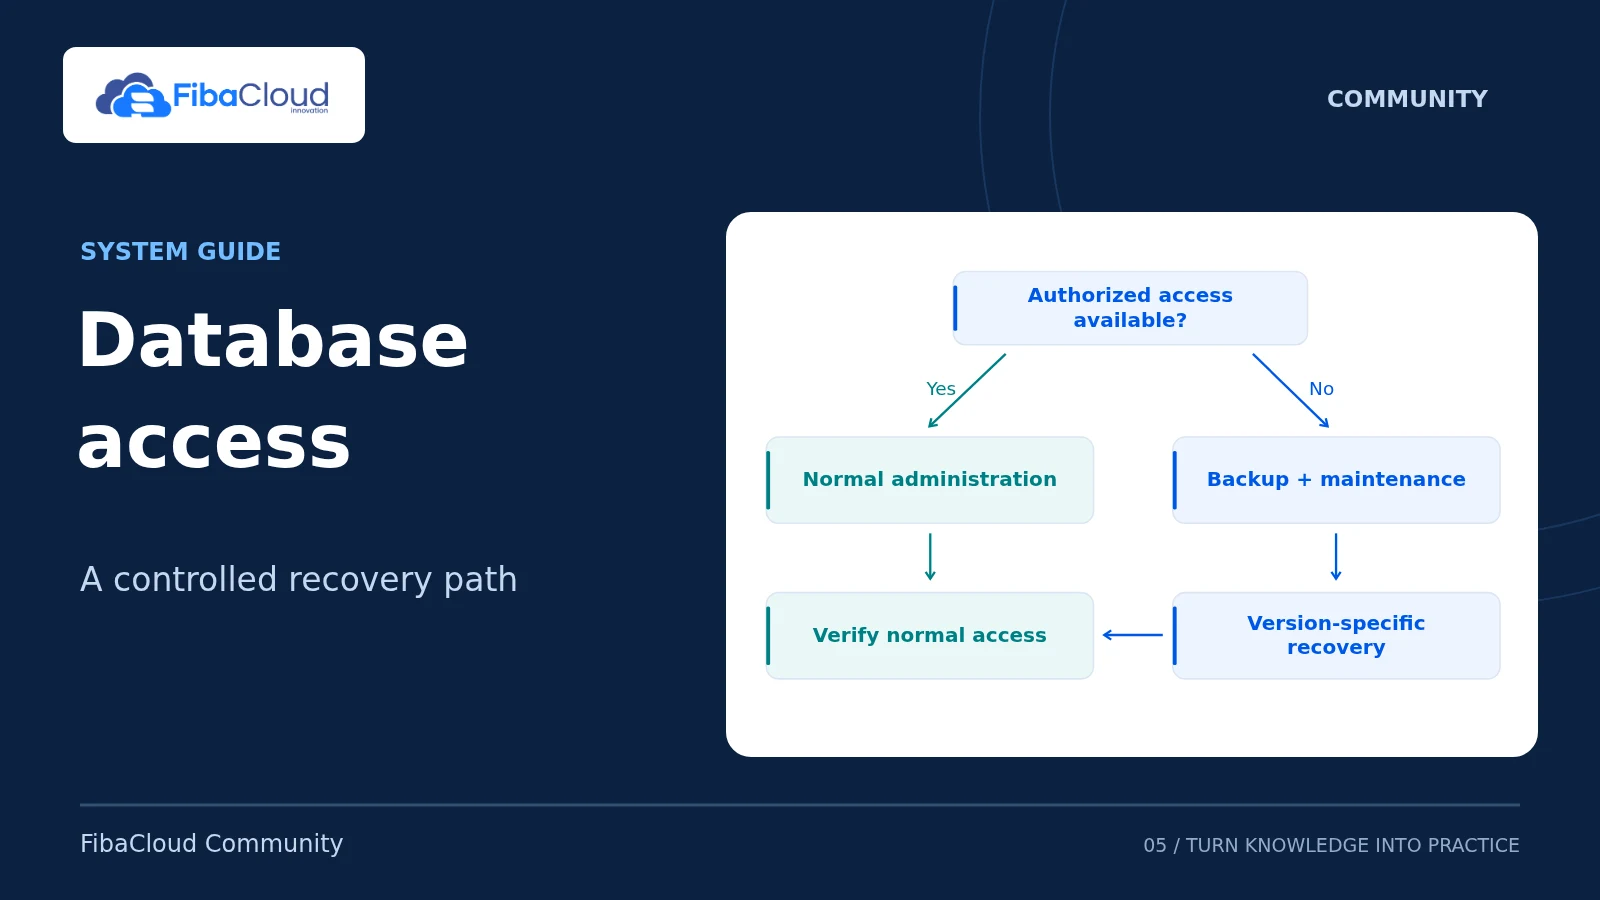
This guide separates Oracle MySQL 8.4 LTS from MariaDB 10.11 LTS. Both product families can use local socket authentication, so an operating-system administrator may already have database access without a database password. Try that route before stopping a service. The emergency MySQL procedure uses the official init-file method; the MariaDB emergency procedure is only for a password-based account whose socket access has been removed. [S1, S4]
Validation — 20 September 2026: Recovery was exercised on Ubuntu 24.04 with MySQL 8.4.11 and MariaDB 10.11.14 in an isolated environment. Successful and failed resets, rejected old passwords, preserved application accounts/data, disabled recovery TCP listeners, and return to normal daemon operation were checked. Boot, systemctl integration and enforcing AppArmor were not tested; validate those on a matching test server before production recovery.
Scope and preparation
The commands below target a single, package-managed server on Ubuntu 24.04 with the standard paths /var/lib/mysql, /run/mysqld/mysqld.sock, and /usr/sbin/mysqld or /usr/sbin/mariadbd. They do not upgrade a database. MySQL 8.4 is a separate product/version choice; do not assume Ubuntu’s default MySQL package is 8.4. Do not apply the commands unchanged to containers, managed databases, custom data directories, multiple instances, replication or Galera clusters.
Before starting:
- Use an existing SSH account with sudo and keep a second administrator terminal or provider console available. Linux root and database root are different accounts.
- Schedule downtime for the application if emergency recovery is needed. Have a verified backup or application-consistent snapshot and its restore procedure.
- Confirm the server executable, version, service configuration and existing data directory. Never run
--initialize,mariadb-install-db, delete a data directory, or install another database version as a password-reset step. - Use a new, long, unique password from a password manager. Replace every password placeholder. The examples assume no literal single quote or backslash in the generated password; otherwise use the server’s documented SQL escaping rules. Do not place a password after a shell
-pargument, in screenshots, or in support tickets. - MariaDB grant-bypass recovery is inappropriate while untrusted local users or workloads can reach the host. Use an isolated maintenance environment in that case. Disabling TCP alone does not protect a local Unix socket.
Check only the product that is installed:
# Oracle MySQL
mysqld --version
sudo systemctl cat mysql

# MariaDB
mariadbd --version
sudo systemctl cat mariadb
The service must use the same default configuration and existing data directory as the manual recovery process below. If its ExecStart has a custom defaults file or other instance-specific settings, stop and adapt the procedure with your administrator. MySQL’s systemd packages need not include mysqld_safe; this guide starts the server executable directly. [S2]
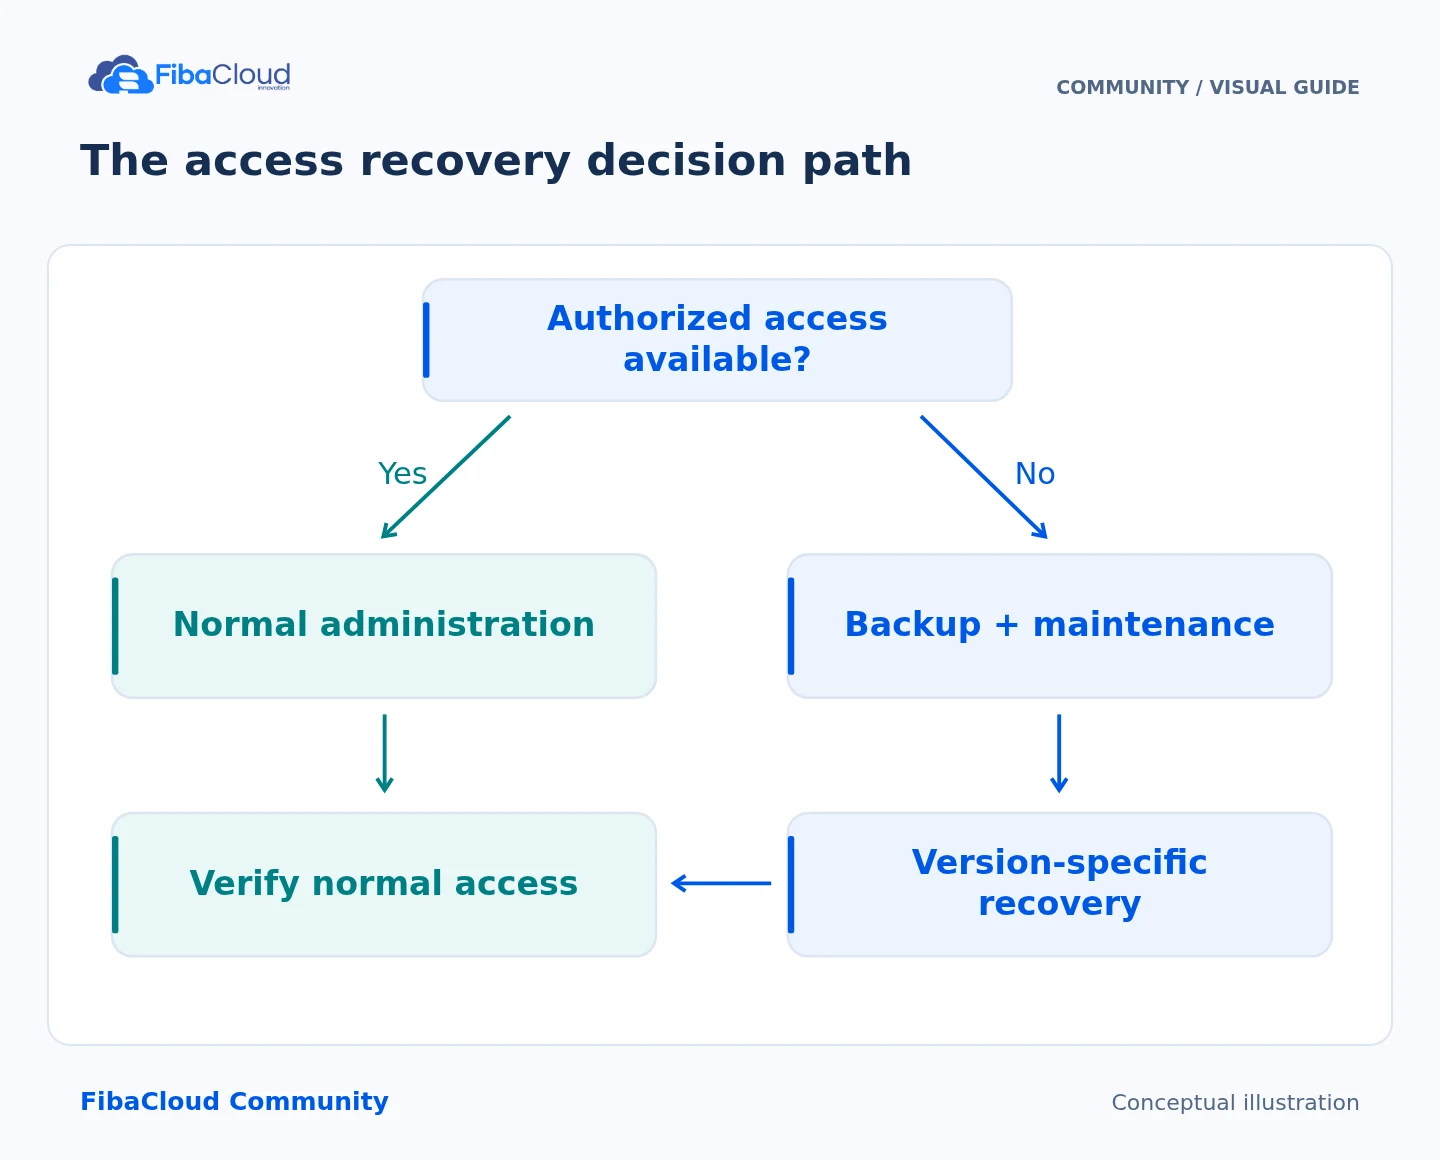
Step-by-step explanation
- Check: Try existing authorized access.
- Prepare: Back up and plan a maintenance window.
- Recover: Follow the procedure for your product/version.
- Verify: Restore normal authentication.
1. Try existing local administrative access
For MySQL:
sudo env MYSQL_HISTFILE=/dev/null mysql --no-defaults --protocol=socket --socket=/run/mysqld/mysqld.sock --user=rootFor MariaDB:
sudo env MYSQL_HISTFILE=/dev/null mariadb --no-defaults --protocol=socket --socket=/run/mysqld/mysqld.sock --user=rootIf the connection works, inspect the account locally. SHOW CREATE USER can include password hashes; keep its output private.
SELECT VERSION(), CURRENT_USER();
SHOW CREATE USER 'root'@'localhost';
Confirm CURRENT_USER() is root@localhost; do not modify a different account by guesswork.
- MySQL auth_socket: successful sudo access is the intended authentication method. There may be no database password to recover. Keep socket authentication unless a deliberate account-policy change is required; that change is outside this recovery procedure.
- MySQL password plugin and an already authorized session: use
ALTER USERbelow, then verify the new password in a separate terminal. No emergency restart is required. - MariaDB unix_socket only: keep using sudo; setting a password for a socket-only account is not a password reset and may be rejected/ignored.
- MariaDB unix_socket OR mysql_native_password: the following SET PASSWORD enables or changes the password-based alternative while preserving socket access. This is the usual modern installation pattern, but confirm the account definition. [S4, S5]
MySQL only:
ALTER USER 'root'@'localhost' IDENTIFIED BY 'REPLACE_WITH_A_LONG_UNIQUE_PASSWORD';MariaDB only, when the account has a password-capable authentication method:
SET PASSWORD FOR 'root'@'localhost' = PASSWORD('REPLACE_WITH_A_LONG_UNIQUE_PASSWORD');PASSWORD() is valid in this MariaDB statement; it was removed from MySQL 8.0. Never copy this MariaDB statement into MySQL. Neither product requires a direct UPDATE of mysql.user. [S3, S5]
If no authorized database session is available, choose exactly one emergency branch below.
2. MySQL 8.4: recover with an init file
This method executes one account-management statement at startup while normal grant checks remain enabled. Network listeners are disabled during this maintenance start. It is preferable to disabling grant checks. [S1]
Stop the normal service. is-active should print inactive; it normally returns a nonzero status in that state. pgrep must not find another mysqld process in this single-instance scope. Do not start a second server on the same data directory.
sudo systemctl stop mysql
sudo systemctl is-active mysql
pgrep -a -x mysqld
Prepare a restricted file readable by the mysql OS user. The shell uses noclobber and creates the file with mode 600; if that filename already exists, creation fails and the editor does not open. Stop and investigate instead of overwriting it. The mysql-files directory is the intended candidate path for the Ubuntu package; confirm the installed AppArmor policy permits reading it. Do not disable AppArmor to make recovery work.
sudo install -d -o mysql -g mysql -m 750 /var/lib/mysql-files
sudo -u mysql sh -c 'set -C; umask 077; : > /var/lib/mysql-files/fc-root-reset.sql' && sudoedit /var/lib/mysql-files/fc-root-reset.sql
Put only this statement in the file, with your new password. It targets the exact account, including its host part. Do not change the authentication plugin to mysql_native_password as a workaround.
ALTER USER 'root'@'localhost' IDENTIFIED BY 'REPLACE_WITH_A_LONG_UNIQUE_PASSWORD';In terminal A, start the same existing database in the foreground. Keep this terminal open. The executable reads its normal option files; the explicit options below restrict this maintenance start. If startup exits or logs an error, use the recovery/cleanup section instead of starting another process.
sudo install -d -o mysql -g mysql -m 755 /run/mysqld
sudo /usr/sbin/mysqld --user=mysql --datadir=/var/lib/mysql --socket=/run/mysqld/mysqld.sock --pid-file=/run/mysqld/mysqld.pid --init-file=/var/lib/mysql-files/fc-root-reset.sql --skip-networking --mysqlx=OFF
In terminal B, use the new password at the prompt. A server reaching “ready” does not prove the init statement succeeded: a weak password or incorrect account can make ALTER USER fail. Successful authentication with the new password is mandatory.
env MYSQL_HISTFILE=/dev/null mysql --no-defaults --protocol=socket --socket=/run/mysqld/mysqld.sock --user=root --passwordConfirm the account, version and disabled TCP networking:
SELECT CURRENT_USER(), VERSION(), @@skip_networking;Expect root@localhost, MySQL 8.4, and skip_networking = 1. Also inspect sudo ss -ltnp: this recovery database process must not own a TCP listener, including an administrative or X Plugin listener. If it does, shut it down and resolve the configuration before continuing. In terminal B, leave the SQL client with exit; the server stays running. Delete the plaintext init file from the shell as soon as the new password has been verified, then shut down the recovery server using the new password. This shutdown, unlike exiting the client, stops the server process.
sudo rm -- /var/lib/mysql-files/fc-root-reset.sql
mysqladmin --no-defaults --protocol=socket --socket=/run/mysqld/mysqld.sock --user=root --password shutdown
Terminal A must return. Confirm no recovery process remains before starting the ordinary service:
pgrep -a -x mysqld
sudo systemctl start mysql
sudo systemctl is-active mysql
3. MariaDB 10.11: emergency recovery only when socket access is unavailable
Use section 1 if sudo/socket access works. The following branch assumes root@localhost uses a password-capable method and no authorized session remains. It temporarily disables account checks and therefore requires exclusive trusted local maintenance access. [S4]
Stop the service and confirm no old server remains. Then start the existing database in terminal A, without TCP networking:
sudo systemctl stop mariadb
sudo systemctl is-active mariadb
pgrep -a -x mariadbd
pgrep -a -x mysqld
sudo install -d -o mysql -g mysql -m 755 /run/mysqld
sudo /usr/sbin/mariadbd --user=mysql --datadir=/var/lib/mysql --socket=/run/mysqld/mysqld.sock --pid-file=/run/mysqld/mysqld.pid --skip-grant-tables --skip-networking
Keep terminal A open. Connect from terminal B without a database password:
sudo env MYSQL_HISTFILE=/dev/null mariadb --no-defaults --protocol=socket --socket=/run/mysqld/mysqld.sock --user=rootCheck the server and exact root account. The expected version starts with 10.11 and skip_networking is 1. Inspect sudo ss -ltnp and confirm that this recovery database process owns no TCP listener; stop recovery if one remains. Then reload grants before SET PASSWORD. That ordering is required for this MariaDB recovery path; the older “FLUSH at the very end” recipe does not apply. [S4]
SELECT VERSION(), @@skip_networking;
SELECT User, Host FROM mysql.user WHERE User = 'root';
FLUSH PRIVILEGES;
SHOW CREATE USER 'root'@'localhost';
Confirm the existing password-capable authentication method; do not remove or replace any existing socket method. For the scoped mysql_native_password account, run:
SET PASSWORD FOR 'root'@'localhost' = PASSWORD('REPLACE_WITH_A_LONG_UNIQUE_PASSWORD');If SET PASSWORD is rejected because the account is socket-only or uses an external/custom plugin, stop; do not update mysql.user or mysql.global_priv directly. Follow that plugin’s administration procedure.
Shut down the recovery server from the still-authorized SQL session. Do not merely EXIT and then start systemd:
SHUTDOWN;When terminal A returns and no recovery process remains, restart normally:
pgrep -a -x mariadbd
pgrep -a -x mysqld
sudo systemctl start mariadb
sudo systemctl is-active mariadb
4. Verify normal operation
For the password-capable account, connect from a non-root OS account and enter the new password at the prompt. This matters for MariaDB dual authentication: a sudo connection can succeed through unix_socket even when the password is wrong. Test the old password separately and expect rejection. Socket-only accounts should instead retain their documented sudo access; do not invent a password check for them.
Use the client for the installed product:
# Oracle MySQL
env MYSQL_HISTFILE=/dev/null mysql --no-defaults --protocol=socket --socket=/run/mysqld/mysqld.sock --user=root --password

# MariaDB
env MYSQL_HISTFILE=/dev/null mariadb --no-defaults --protocol=socket --socket=/run/mysqld/mysqld.sock --user=root --password
Check recovery options and compare networking with its documented pre-maintenance configuration. A deliberately socket-only deployment may normally keep skip_networking ON; do not enable TCP just to match an example.
SELECT CURRENT_USER(), VERSION();
SHOW VARIABLES WHERE Variable_name IN ('skip_grant_tables', 'skip_networking', 'init_file');- Grant bypass must be off. On the MySQL init-file branch, init_file must be empty and the recovery SQL file absent.
- The application must connect with its own existing database account; verify one harmless read and its usual health check. Its data and privileges must be unchanged. Do not switch application credentials to root.
- If MariaDB originally had socket authentication, verify sudo access and the authentication definition are preserved.
- Perform a controlled service restart during the maintenance window and repeat the authentication and application checks.
If a step fails
Keep application traffic paused. Inspect the local server error log; do not post passwords, hashes or the init file. If a recovery process is still running and normal authenticated shutdown is unavailable, identify the exact recovery PID from the configured pid file, verify its command and owner, and send that process SIGTERM. Do not use broad pkill commands or SIGKILL. Wait for it to stop before starting the original service.
For MySQL, remove the temporary init file even when its ALTER USER failed, and start without any recovery options. The old password may still be in force when ALTER USER failed; verify instead of assuming a reset happened. For MariaDB, stop the bypass process and restart with ordinary configuration even when SET PASSWORD failed. Never leave an unprotected recovery process running. Do not restore a whole data directory casually; use the previously verified recovery plan if data recovery is required.
Leave a Reply